Table of Contents (10 sections)
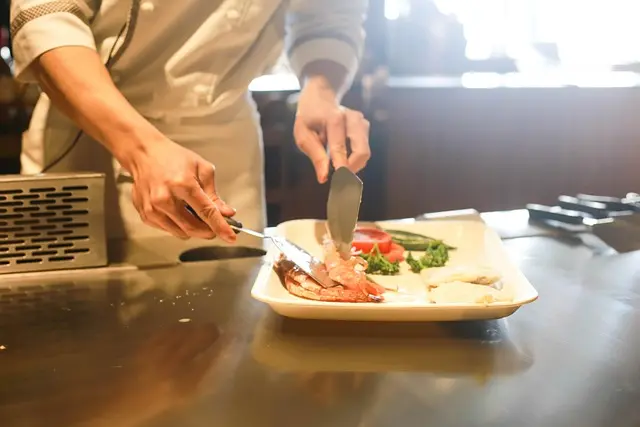
In the art of cooking, plating is a crucial skill that often goes unnoticed. The way a dish is presented can significantly affect the diner's experience and perception of the food. In this tutorial, we will explore effective plating techniques that can transform ordinary meals into works of art.
1. Understanding the Basics of Plating Techniques
Plating techniques refer to the methods used to arrange food on a plate. It's not just about making food look beautiful; it’s about enhancing the overall dining experience. A well-plated dish can stimulate the senses, making diners more excited to eat. According to studies, visual appeal can influence taste perceptions, making foods appear more flavorful. When you plate your dishes, consider the following elements: color, texture, shape, and arrangement.
- Color: Use a variety of colors to create contrast and vibrancy. For example, bright greens or reds can enhance a white plate.
- Texture: Incorporate different textures like crunchy, creamy, and smooth to add interest.
- Shape: Think about the shapes of your ingredients. Utilizing various cuts and forms can make your plate visually appealing.
- Arrangement: Consider how to arrange elements. Use techniques such as stacking, layering, and negative space to create balance.
2. Essential Tools for Plating
To master plating techniques, having the right tools is essential. While a chef’s knife and cutting board are invaluable in the preparation stage, specialized plating tools can help you present food artfully. Some important tools include:
- Tweezers: For precise placement of delicate components like microgreens or herbs.
- Squeeze Bottles: Ideal for creating artistic sauces or purées.
- Ring Molds: Useful for layering ingredients and creating height.
- Palette Knives: For spreading sauces evenly or swirling colors deliberately.
Using these tools can significantly elevate your plating skills. A study by Culinary Institute of America revealed that chefs who invest in quality plating tools can enhance their presentation skills and confidence in the kitchen.
3. Step-by-Step Plating Process
Now that you’re familiar with the basics and tools, let’s dive into a step-by-step process for plating.
Step 1: Choose Your Plate
The foundation of any plated dish is, of course, the plate. Consider the size and shape carefully. A large, white plate can create an open canvas, while smaller plates can be great for tapas or appetizers.
Step 2: Create a Base
Start by laying down the foundational component of your dish. This should be the heart of your creation—often a protein or a starch like rice or mashed potatoes. Place it in the center or slightly off-center, depending on the desired visual effect.
Step 3: Layer Ingredients
Add other components in layers. Use ring molds for structured layers and to keep ingredients from spilling over. Be mindful of colors and textures, aiming for a mixture that visually excites.
Step 4: Add Sauces and Garnishes
Drizzle sauces strategically using squeeze bottles or spooning them carefully around the plate. Finish with garnishments like herbs, edible flowers, or microgreens for a pop of color and freshness. Diners respond positively to these final touches as they add finesse.
Step 5: Step Back and Evaluate
Before serving, take a step back to evaluate your work. Are there elements that seem out of place? Would a small adjustment improve balance? Sometimes, the best feedback comes from a moment of pause.
4. Common Mistakes to Avoid in Plating
Even seasoned culinary professionals can make errors while plating. Here are a few common mistakes and how to avoid them:
- Overcrowding: Don’t try to fit too much on the plate. Less is often more.
- Poor Color Choices: Avoid plating dishes that don’t contrast well with the plate. This can make them visually dull.
- Neglecting Cleanliness: Always wipe off the rim of your plates before serving to ensure a clean presentation.
- Ignoring Scale: Ensure your food items are proportional to the plate size. A too-small item on a large plate can look lost.
Fixing these issues can drastically improve how your dishes are perceived.
5. Advanced Plating Techniques
Once you’re comfortable with the basics, start experimenting with advanced techniques. Try the following methods:
- Deconstruction: Present familiar food items in a new, modern way—separating components can create intrigue.
- Vertical Plating: Build height on the plate using stackable ingredients to create drama.
- Natural Elements: Incorporate unexpected elements, such as stones or leaves, in design for a rustic feel.
By varying your approach and being creative, you can develop a unique plating style that reflects your culinary identity.
Checklist for Perfect Plating
- [ ] Choose the right plate size and shape
- [ ] Ensure color contrast
- [ ] Layer ingredients thoughtfully
- [ ] Clean plate edges before serving
- [ ] Evaluate harmony and balance visually
Glossary
| Term | Definition |
|---|---|
| Negative Space | The empty area around food on a plate that helps to highlight the dish's elements. |
| Deconstruction | A plating style that presents components separately instead of combined, creating visual interest. |
| Visual Balance | The arrangement of elements on a plate to create an aesthetically pleasing symmetry or composition. |
> 💡 Expert Opinion: Good plating isn’t merely decoration—it's a skill that enhances the dining experience and entices diners to engage with the meal.
📺 Resource Video
> For further insights on plating techniques, search on YouTube for "how to master plating techniques for chefs".
Recommended Products
- Product 1: Context explaining why this product enhances your plating skills.
- Product 2: Context explaining why this product enhances your plating skills.
- Product 3: Context explaining why this product enhances your plating skills.
📺 Pour aller plus loin : how to master plating techniques for chefs sur YouTube
Recommended products
Selected by our experts